Chapter 06 – Part 02: STRENGTH DEVELOPMENT & LIFTING TECHNIQUES
06
CHAPTER
STRENGTH DEVELOPMENT & LIFTING TECHNIQUES
Part 2: Upper Body
The larger upper body muscle groups of the back and chest are targeted as primary areas.
Chest Exercises
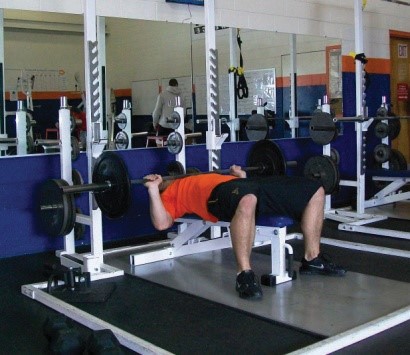
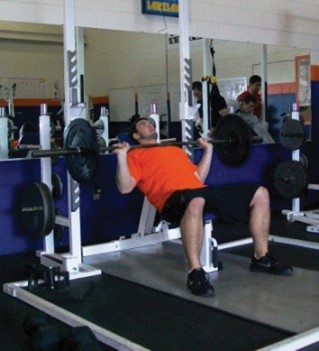
Bench Press
Lie back on bench establishing five points of contact (head, shoulders/back and buttocks) on the bench and right and left feet flat on floor
Position body so that eyes are directly below the racked bar
Using an overhand, closed grip, place your hands wide enough that your forearms are perpendicular to the floor in the bottom position of the lift
With help of a spotter, lift the bar off the rack so that the bar is above the shoulders
Slowly and under control, lower the bar to the chest, touching the chest in line with the nipples
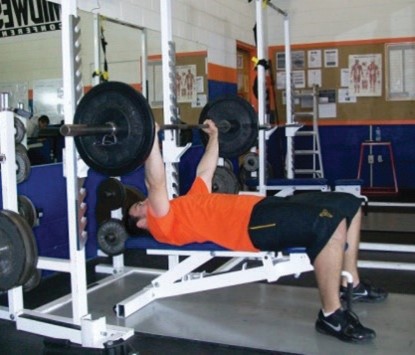
Maintaining the five points of contact (do not arch excessively where the hips lift off the bench), press the bar upwards and slightly back to the original position over the shoulders, keeping the elbows slightly bent at the top of the movement
Figure 6.33: Bench Press Bottom Position
Figure 6.34: Bench Press Top Position
Video 6.16
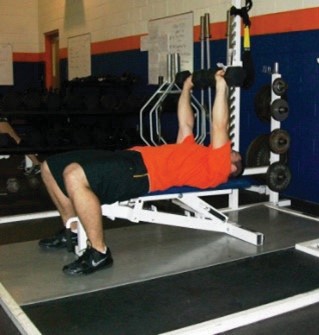
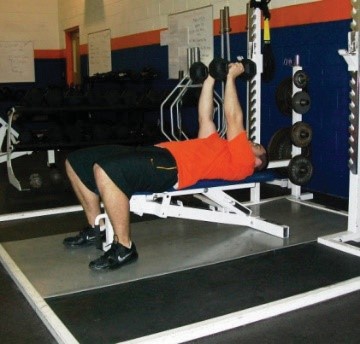
Dumbbell Chest Press
Lie back on bench establishing five points of contact (head, shoulders/back and buttocks) on the bench and right and left feet flat on floor
Starting with the dumbbell in your hands, start with hands just outside your chest, just above chest height
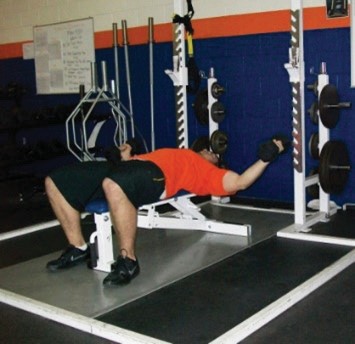
Maintaining the five points of contact (do not arch excessively where the hips lift off the bench), press the dumbbell upwards and slightly back to over the shoulders, keeping the elbows slightly bent at the top of the movement
Slowly and under control, lower the dumbbell to the chest, touching the side of the chest in line with the nipples
Figure 6.35: Dumbbell Chest Press Bottom Position
Figure 6.36: Dumbbell Chest Press Top Position
Video 6.17
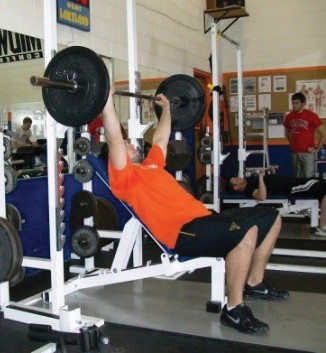
Incline Bench Press
Sit down at the incline bench (positioned at a 45- to 60-degree angle), position your feet flat on the ground with thighs parallel to the floor
Lean back on bench establishing five points of contact (head, shoulders/back and buttocks) on the bench and right and left feet on floor
Grip the bar with an overhand, closed grip, slightly wider than shoulder width (a narrower grip than the bench press grip increases the focus on the upper chest)
Starting with the bar above your eyes, lower the bar slowly, under control, touching the bar to your upper chest
Maintaining the five points of contact (do not arch excessively where the hips lift off the bench), press the bar upwards and slightly back to the original position, keeping the elbows slightly bent at the top of the movement
Figure 6.37: Incline Bench Press Bottom
Figure 6.38: Incline Bench Press Top
Video 6.18
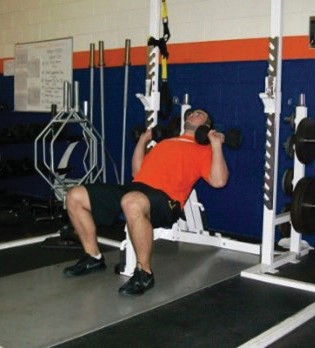
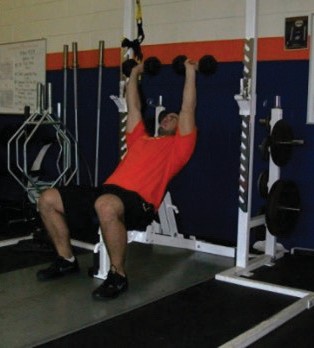
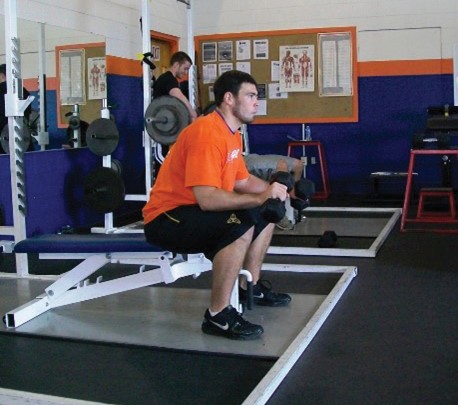
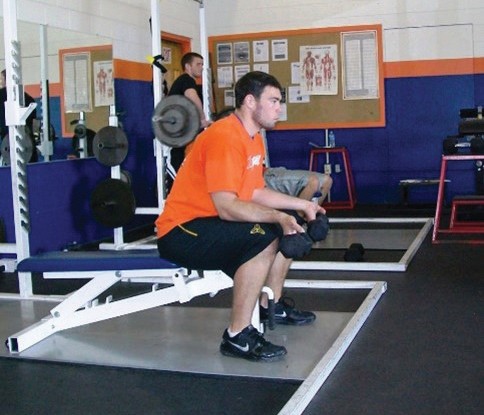
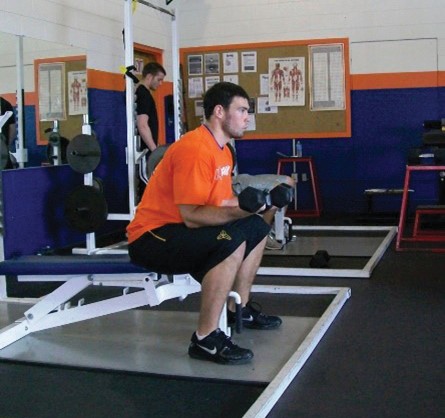
Incline Dumbbell Chest Press
Sit down at the incline bench (positioned at a 45- to 60-degree angle) position your feet flat on the ground with thighs parallel to the floor
Lean back on bench establishing five points of contact (head, shoulders/back and buttocks) on the bench and right and left feet on floor
With the dumbbell in your hands, start with hands just outside your chest, even with your up- per chest
Maintaining the five points of contact (do not arch excessively where the hips lift off the bench), press the dumbbell upwards and slightly back to over the eyes, keeping the elbows slightly bent at the top of the movement
Slowly and under control, lower the dumbbell to the upper chest, touching the side of the upper chest
Figure 6.39: Incline Dumbbell Chest Press Bottom
Figure 6.40: Incline Dumbbell Chest Press Top
Video 6.19
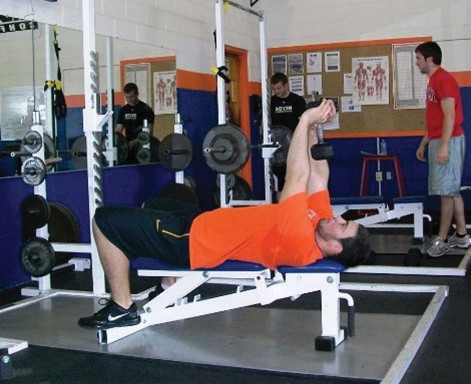
Flat Dumbbell Fly
Lie back on bench establishing five points of contact (head, shoulders/back and buttocks) on the bench and right and left feet flat on floor
Starting with your arms extended (with slight bend in the elbows) with the dumbbell over your chest and palms facing together
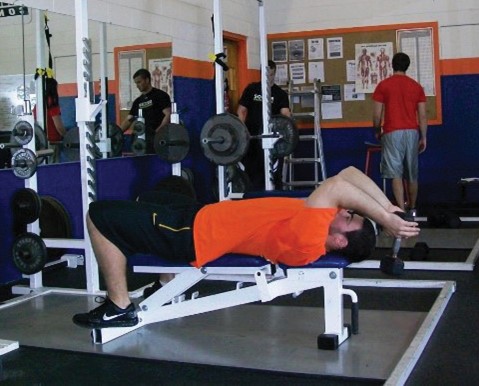
With elbows staying bent at the same angle all the way through the movement, slowly and under control, lower the arms directly out to the sides in an arcing pattern
When hands are even with the chest, maintain the five points of contact (do not arch excessively where the hips lift off the bench) and in the same arcing pattern raise the back up to the starting position
Figure 6.41: Dumbbell Fly Starting Position
Figure 6.42: Dumbbell Fly Bottom Position
Video 6.20
Back Exercises
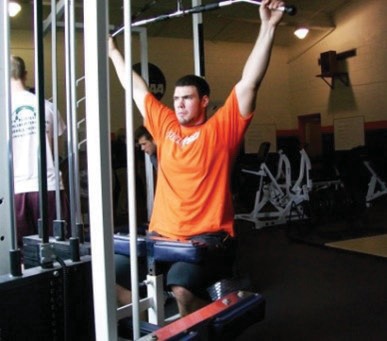
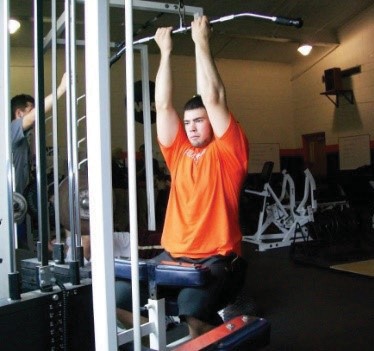
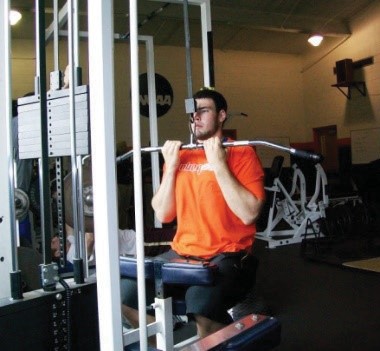
Wide Grip Lat Pulldown
From a seated position with thighs parallel to the floor and feet flat on the floor, grab the bar with an overhand, closed grip with hands evenly spaced wider than shoulder width
Lean back slightly, with arms extended and elbows slightly bent
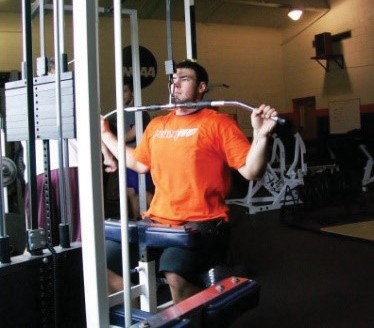
Keeping your upper body stable, pull the bar down, leading with your elbows to the clavicles/ upper chest
Under control, slowly guide the bar back to the starting position
Do not let the bar jerk you up, maintain your upper body position and maintain a slight bend in the elbows are the top of the movement
Figure 6.43: Wide Grip Lat Pulldown Top
Figure 6.44: Wide Grip Lat Pulldown Bottom
Video 6.21
Narrow Grip Lat Pulldown
From a seated position with thighs parallel to the floor and feet flat on the floor, grab the bar with an underhand, closed grip using a narrow grip (hands 6-10 inches apart)
Keep the upper body straight in line, arms extended with elbows slightly bent
Keeping your upper body stable, pull the bar down, leading with your elbows to the clavicles/ upper chest
Under control, slowly guide the bar back to the starting position
Do not let the bar jerk you up. Maintain your upper body position and maintain a slight bend in the elbows are the top of the movement
Figure 6.45: Narrow Grip Lat Pulldown Top
Figure 6.46: Narrow Underhand Grip Lat Pulldown
Video 6.22
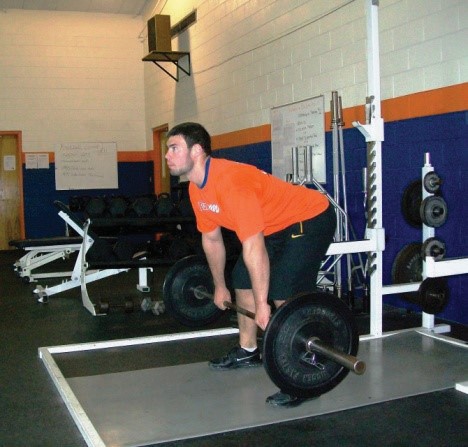
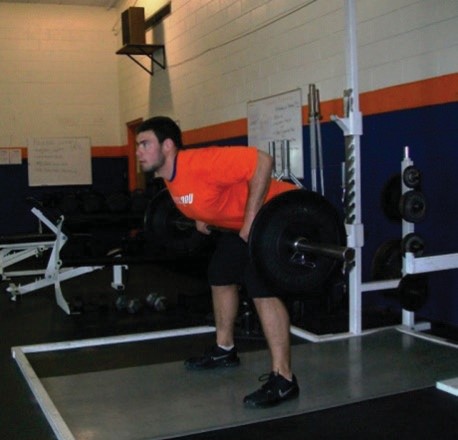
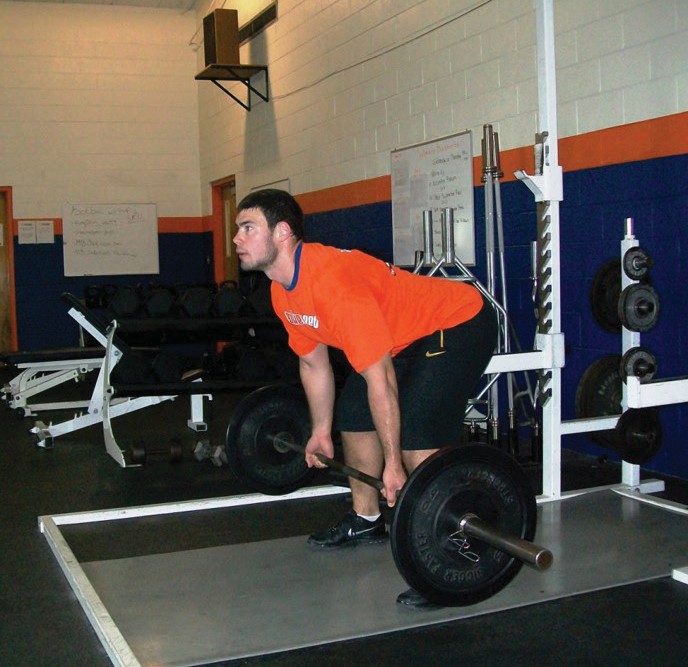
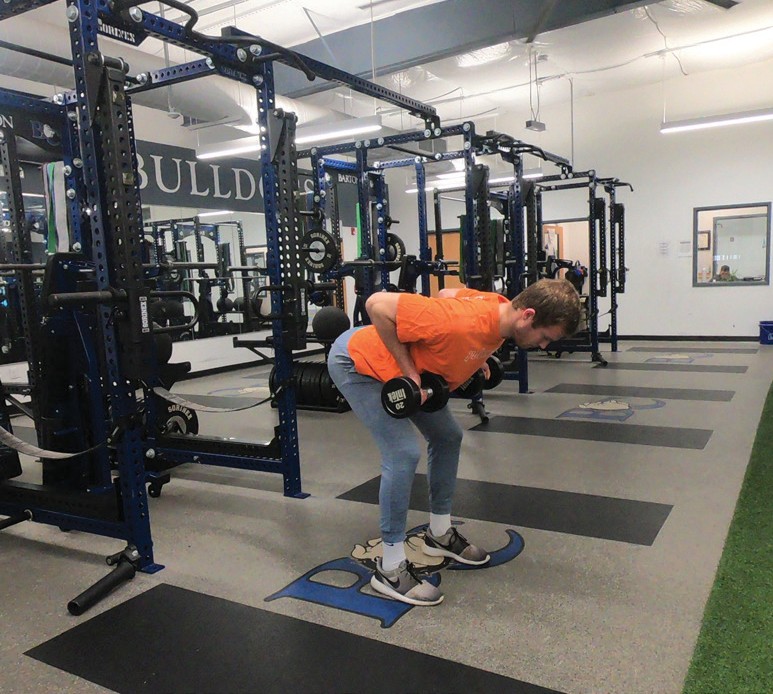
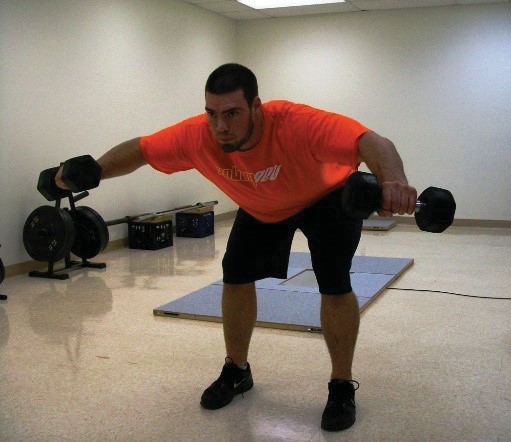
Bent-Over Row
With feet shoulder width apart (or slightly wider) and keeping legs straight (with slight bend in knees) bend your upper body forward so that your back is parallel to the ground
Grip the bar with either an overhand (pronated) or underhand (supinated) closed grip
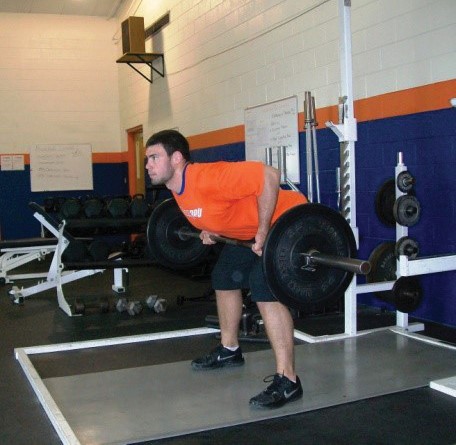
As you pull the bar up to just below your chest, maintain your back position, while pulling the shoulders back as the elbows flex upwards and away from the body (the underhand grip will keep the elbows tighter to the body)
Pull the bar all the way up to your body, then slowly and under control lower the bar back down extending your arms
Maintain a slight bend in the elbows at the bottom position and do not let the weight touch the ground between repetitions so that the muscles remain under resistance during the whole set
Figure 6.47: Pronated Grip Bent-Over Row Bottom
Figure 6.48: Pronated Grip Bent-Over Row Top
Figure 6.49: Supinated Grip Bent-Over Row Bottom
Figure 6.50: Supinated Grip Bent-Over Row Top
Video 6.23
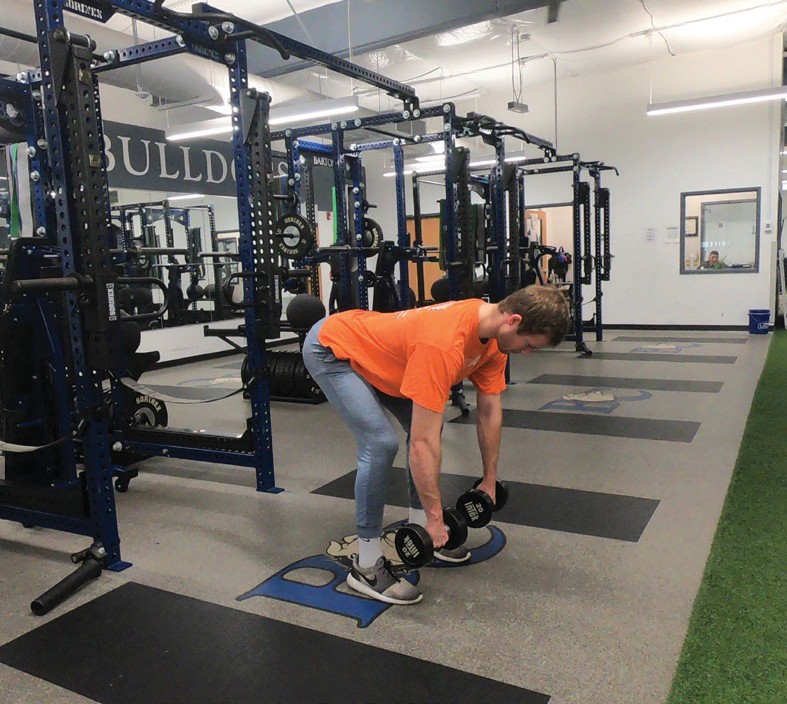
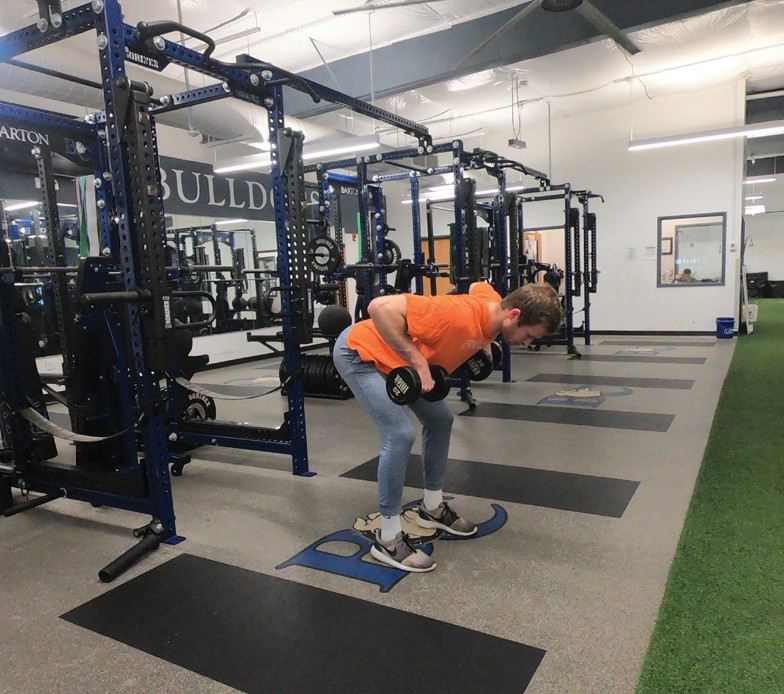
Dumbbell Variations
Figure 6.51: Pronated Grip Bent-Over Row Bottom with Dumbbell
Figure 6.52: Pronated Grip Bent-Over Row Top with Dumbbell
Figure 6.53: Supinated Grip Bent-Over Row Bottom with Dumbbell
Figure 6.54: Supinated Grip Bent-Over Row Top with Dumbbell
Video 6.24
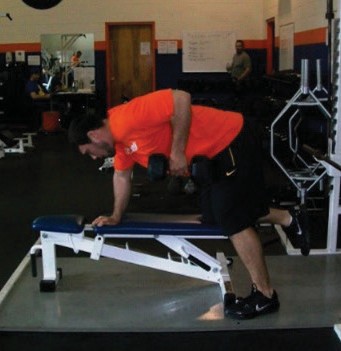
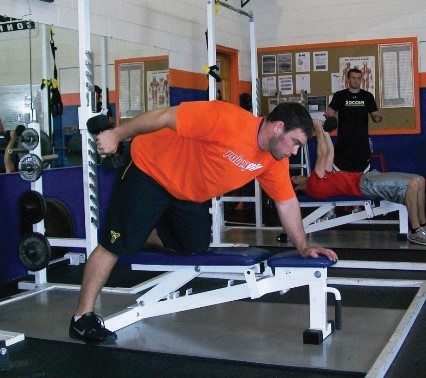
One-Arm Dumbbell Row
Stand to the right side of a flat bench, place your left hand on the bench in line with your shoulder and place your left knee on the bench in line with your hip
With your left hand and left knee on the bench, keep your upper body parallel to the floor maintaining a flat back
Your right leg should be close to the side of the bench with a slight bend in the right knee and your foot flat on the floor
Grasping a dumbbell in your right hand extend your arm in line with your chest, keeping a slight bend in your elbow at the bottom position
Maintaining a flat back position, pull the dumbbell up, leading with your elbow, until your elbow is slightly higher than your back and your hand is just below your chest
Lower the dumbbell in a slow, controlled manner back to the starting position
Repeat with the other side
Figure 6.55: One-Arm Row Bottom
Figure 6.56: One-Arm Row Top
Video 6.25
Video 6.26
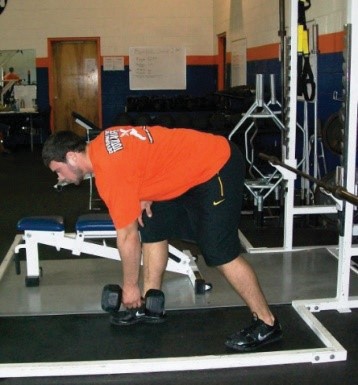
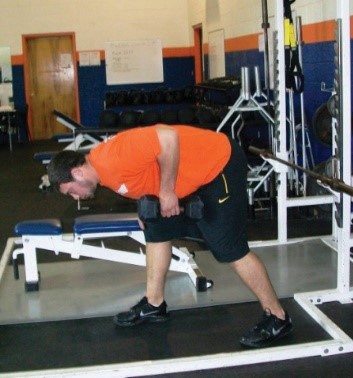
Three-Point Stance Row
The Three-Point Stance Row is performed the same way as the One-Arm The only difference is that the lifter uses his/her own body for support instead of a bench
Take a staggered stance with knees slightly bent, bending at the hips so that your upper body is parallel to the floor with your back flat
Place the hand opposite the DB on your knee to stabilize your position
Figure 6.57: Three-Point Stance Row Bottom
Figure 6.58: Three-Point Stance Row Top
Video 6.27
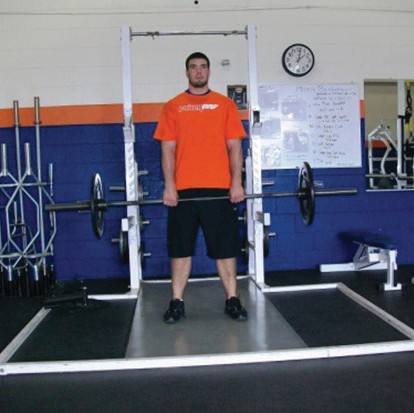
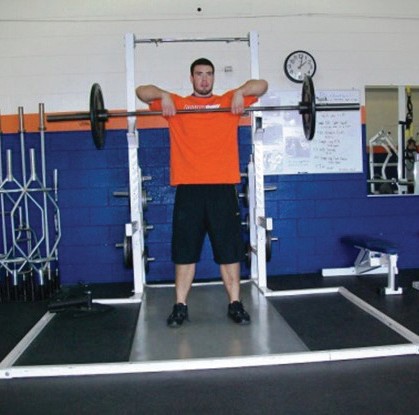
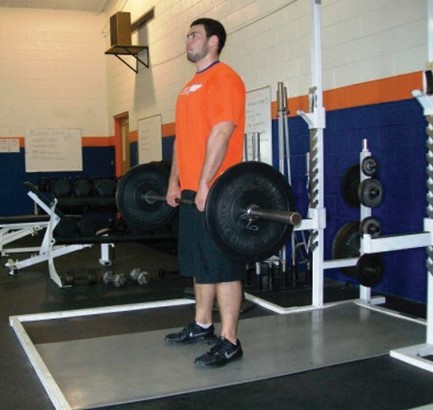
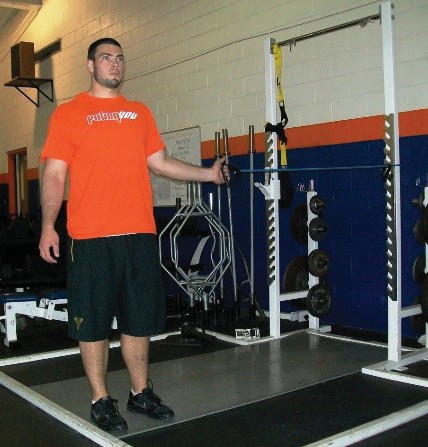
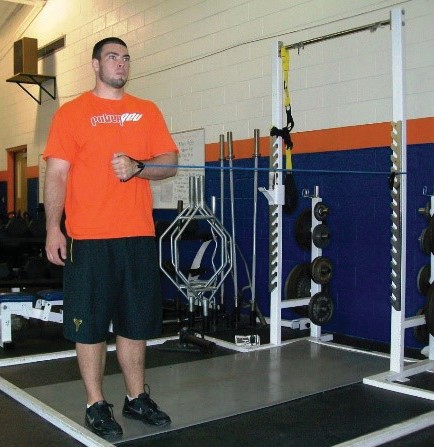
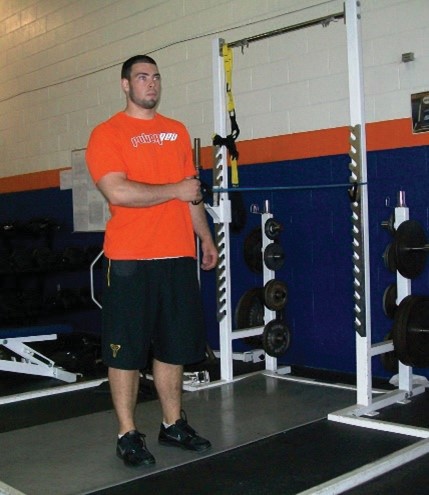
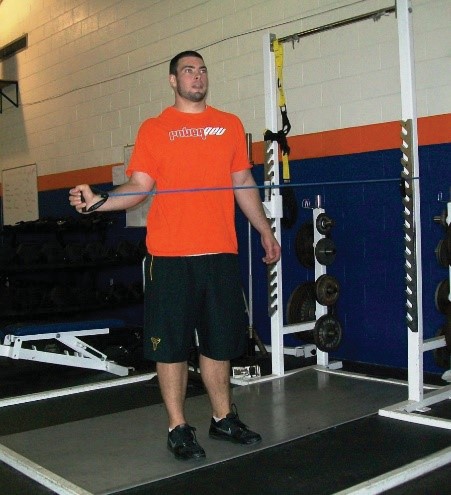
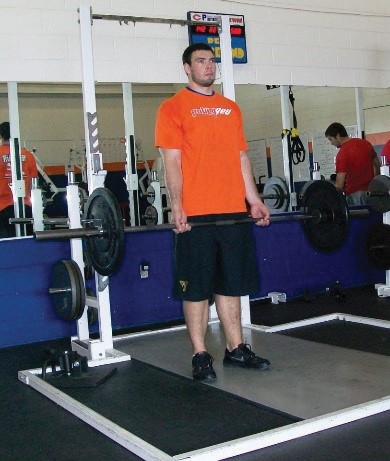
Upright Row
Standing with feet shoulder width apart and knees slightly bent, grip the bar using an overhand, closed grip with hands narrower than shoulder width
With the bar hanging at hip height and with arms extended (maintaining a slight bend in the elbows), keep your body stable as you pull the bar up until your hands are at shoulder height
As you raise the bar close to your body leading with your elbows, keep the elbows above the wrists throughout the whole movement
Maintaining a stable body position, lower the bar as you slowly extend your arms back to the starting position
Figure 6.59: Upright Row Bottom (front view)
Figure 6.60: Upright Row Top (front view)
Figure 6.61: Upright Row Bottom (side view)
Video 6.28
Dumbbell Variations
Figure 6.62: Upright Row Top with Dumbbell
Figure 6.63: Upright Row Bottom with Dumbbell
Video 6.29
Shoulder Exercises
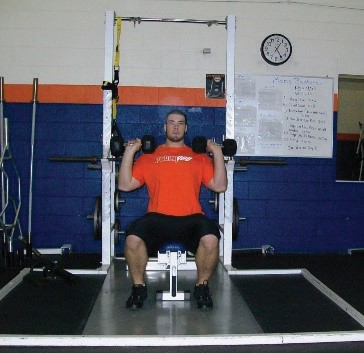
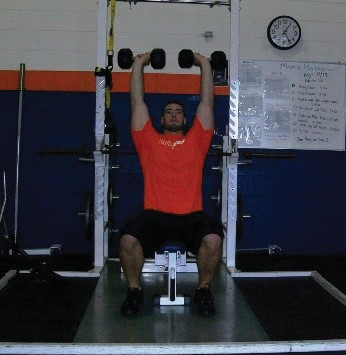
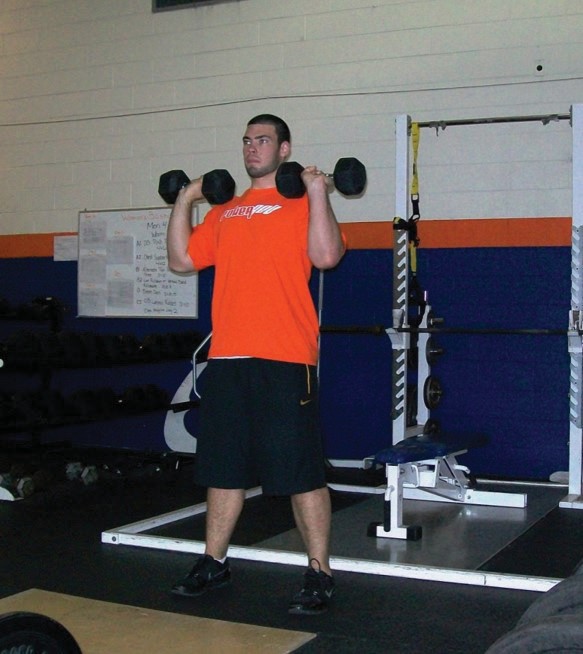
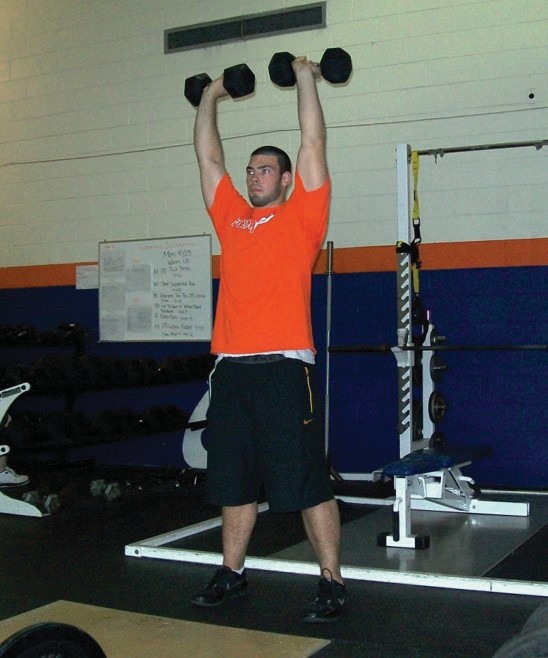
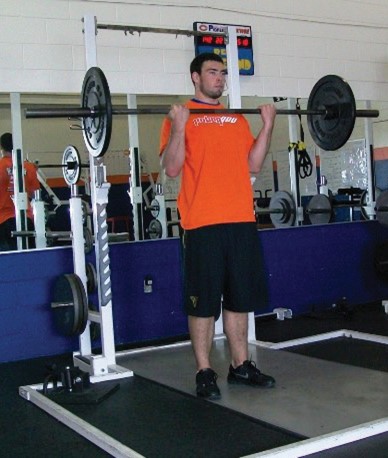
Shoulder Press
Can be performed in either a seated or standing position
Standing: stand up straight with feet shoulder width apart and knees slightly bent
Seated: sit with feet firmly on the floor, shoulder width apart, keeping back straight (if bench has a back pad, rest back against pad for support)
Start holding dumbbells with an overhand grip, with hands at shoulder height
Press the weight straight up, stopping just short of fully extending the elbows
Under control, lower the weight back to shoulder height
Figure 6.64: Shoulder Press (seated) Bottom Position
Figure 6.65: Shoulder Press (seated) Top Position
Figure 6.66: Shoulder Press (standing) Bottom Position
Figure 6.67: Shoulder Press (standing) Top Position
Video 6.30
Video 6.31
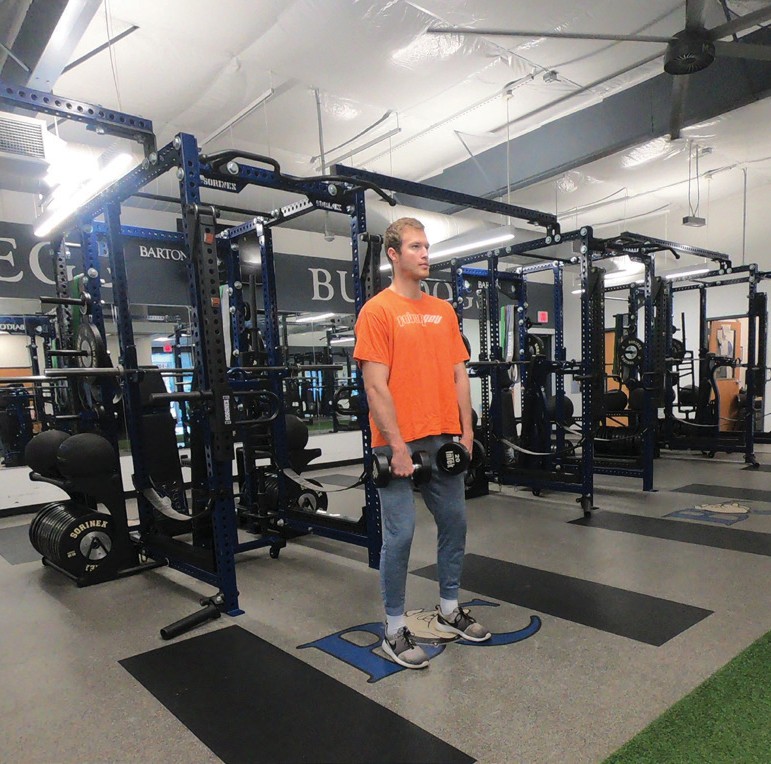
Front Raise
Start in a standing position with knees slightly flexed and with hands placed in front of thighs using an overhand close grip (hands facing thighs)
Body should remain stable throughout movement with knees slightly flexed (to take pressure off the lower back)
Pull hands and weight vertically, raising the arms to shoulder height leading with the hands/wrist
Pause briefly, and then lower arms down, keeping elbows slightly flexed, back to starting position
Figure 6.68: Front Raise Bottom Position
Figure 6.69: Front Raise Top Position
Video 6.32
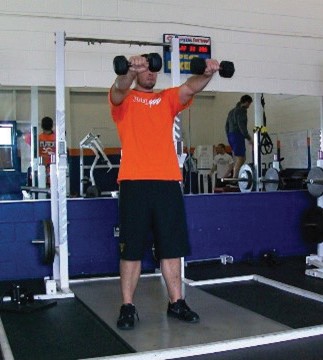
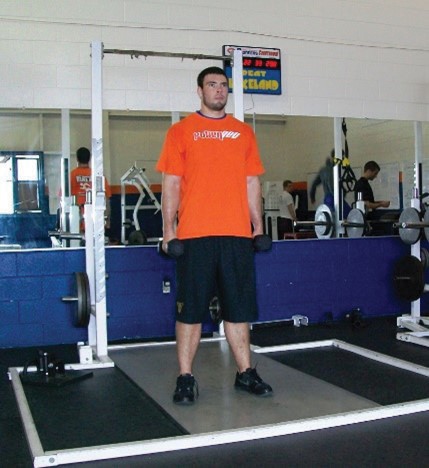
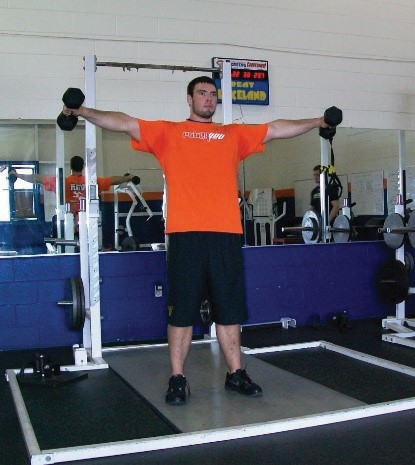
Side Raise
Start in a standing position with knees slightly bent
Hands placed in on the side of thighs using an overhand close grip (hands facing in)
Body should remain stable throughout movement with knees slightly flexed (to take pressure off the lower back)
Pull hands and weight vertically raising/abducting the arms to shoulder height leading with the hands/wrist
Pause briefly, and then lower arms down, keeping elbows slightly flexed, back to starting position
Always keep elbows slightly flexed and at the same angle all the way through the movement
Figure 6.70: Side Raise Bottom Position
Figure 6.71: Side Raise Top Position
Video 6.33
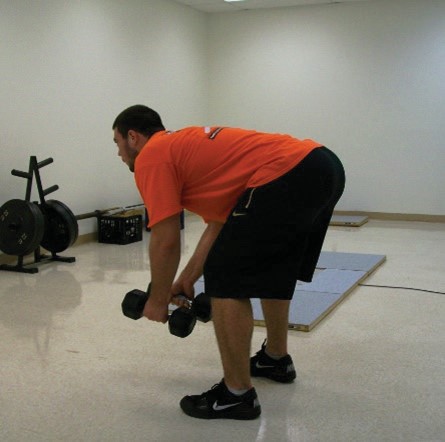
Posterior Raise
Bending at the waist, lower your upper body to parallel with the floor
In a standing position, place feet shoulder width apart with knees slightly bent
In a seated position, keep feet firmly on the ground shoulder width apart and lower your chest to your knees
Keeping back straight, let your arms be extended towards the ground with elbows bent slightly and the top of your hands even with your ears (to align line of pull with the posterior deltoid)
Maintain the same elbow angle as you raise your arms up to shoulder height, keeping the hands forward so that tension remains on the targeted muscle
Under control, lower your arms / hands back to the starting position
Figure 6.72: Posterior Raise Bottom Position
Figure 6.73: Posterior Raise Top Position
Video 6.34
Internal Rotation
Tubing or cable height should be placed at elbow height
Using an adequate resistance, step far enough from the machine or anchor so that the cable or tube is tight without slack
Holding elbow steady at your side, start with your hand reaching out while your elbow is bent at 90 degrees
Keeping elbow stationary, internally rotate your shoulder to pull the cable or tube across your body
Externally rotate your shoulder to return to starting position
Figure 6.74: Internal Rotation Starting Position
Figure 6.75: Internal Rotation Finishing Position
Video 6.35
External Rotation
Tubing or cable height should be placed at elbow height
Using an adequate resistance, step far enough from the machine or anchor so that the cable or tube is tight without slack
Holding elbow steady at your side, start with your hand across your body while your elbow is bent at 90 degrees
Keeping elbow stationary, externally rotate your shoulder to pull the cable or tube across your body until your hand is extended away from your body
Internally rotate your shoulder to return to starting position
Figure 6.76: External Rotation Starting Position
Figure 6.77: External Rotation Finishing Position
Video 6.36
Straight Bar Curl
Start in a standing position with knees slightly flexed, with feet shoulder width apart, arms extended, with hands to the side of your thighs shoulder width apart using an underhand grip
Upper body should remain upright and stable throughout movement, with knees slightly flexed (to take pressure off the lower back)
Pull bar up to shoulder height, flexing only at the elbow joint (keeping elbows steady and in tight throughout movement)
Pause briefly then return hands back down to starting position
Figure 6.78: Straight Bar Curl Bottom Position
Figure 6.79: Straight Bar Curl Top Position
Video 6.37
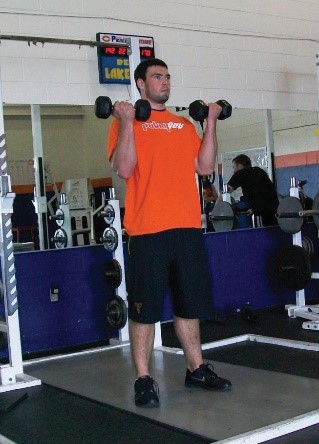
Standing Dumbbell Curl
Start in a standing position with knees slightly flexed, with feet shoulder width apart, arms extended, with hands to the side of your thighs shoulder width apart using an underhand grip
Upper body should remain upright and stable throughout movement with knees slightly flexed (to take pressure off the lower back)
Pull dumbbells up to shoulder height, flexing only at the elbow joint (keeping elbows steady and in tight throughout movement)
Pause briefly then return hands back down to starting position
Figure 6.80: Standing Dumbbell Curl Bottom Position
Figure 6.81: Standing Dumbbell Curl Top Position
Video 6.38
Hammer Curl
Start in a standing position with knees slightly flexed, with feet shoulder width apart, arms extended, with hands to the side of your thighs shoulder width apart using an underhand grip
Grip the dumbbells as you would grip a hammer so that your palms face your thighs
Use of the hammer grip shifts more emphasis to the forearm muscles
Upper body should remain upright and stable throughout movement with knees slightly flexed (to take pressure off the lower back)
Pull dumbbells up to shoulder height, flexing only at the elbow joint (keeping elbows steady and in tight throughout movement)
Pause briefly then return hands back down to starting position
Figure 6.82: Hammer Curl Bottom Position
Figure 6.83: Hammer Curl Top Position
Video 6.39
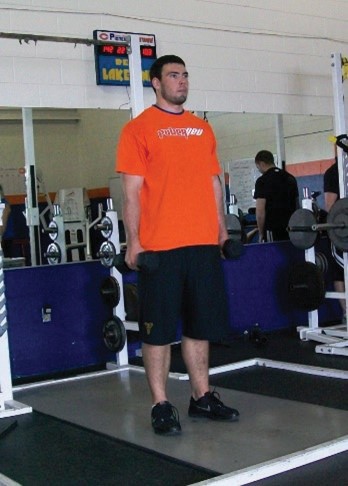
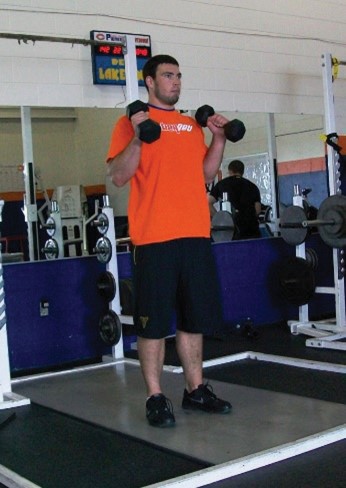
Overhead Triceps Extensions (Two Hands)
Position one dumbbell overhead with both hands under inner plate (heart shaped grip)
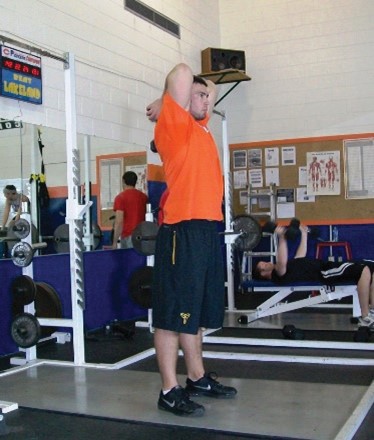
With elbows overhead, lower weight behind the head by flexing elbows
Flex wrists at bottom to avoid hitting dumbbell on back of neck
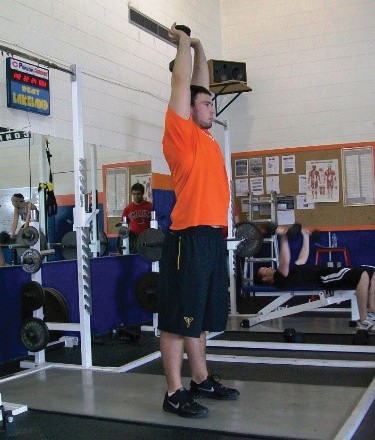
Raise dumbbell overhead by extending elbows
Keep elbows tight to the ears/head to keep resistance focused on the triceps
Slowly lower the dumbbell back to the starting position
Figure 6.84: Overhead Triceps Extensions (Two Hands) Bottom Position
Figure 6.85: Overhead Triceps Extensions (Two Hands) Top Position
Video 6.40
Overhead Triceps Extensions (Single Arm)
Position dumbbell over head with arm straight up or slightly back
Lower dumbbell behind neck or shoulder while maintaining upper arm’s vertical position throughout exercise
Extend arm until almost straight
Slowly lower the dumbbell back to the starting position
Continue with opposite arm
Figure 6.86: Overhead Triceps Extensions (Single Arm) Bottom Position
Figure 6.87: Overhead Triceps Extensions (Single Arm) Top Position
Video 6.41
Lying Triceps Extensions
Lie on bench maintaining five points of contact (head, shoulders, hips and feet) with narrow overhand grip on barbell or heart-shaped grip with a dumbbell (like in the two arm overhead extension)
Position barbell over shoulders with arms extended
With a bar: lower bar to forehead by bending elbows
With a dumbbell: lower the dumbbell behind your head till hands are at forehead height
Keeping elbows in tight, extend arms just short of full extension
Figure 6.88: Laying Triceps Extensions Starting Position
Figure 6.89: Laying Triceps Extensions Bottom Position
Video 6.42
Triceps Kickback
Kneel on bench with one knee and with arm of the same side supporting body, keeping back flat
Other foot is firmly on the floor next to the bench
Grasp dumbbell with other hand, position upper arm parallel to floor
Extend arm until it is almost straight
Continue with opposite arm
Figure 6.90: Triceps Kickback Starting Position
Figure 6.91: Triceps Kickback Finishing Position
Video 6.43
Triceps Pushdowns
Stand close to the high pulley station of the machine
Start in a standing position with feet shoulder width apart and knees slightly flexed
Hands placed just above chest height using an overhand close grip with elbows firmly tucked in against sides
Body should be upright, remaining stable throughout movement with knees slightly flexed (to take pressure off the lower back)
Be careful of leaning upper body forward and shifting emphasis to the chest
Push handles down just short of full extension, keeping elbows close to sides. Pause briefly, then raise hands back to starting position.
A rope attachment can be used in place of the handle to put more emphasis on the triceps by spreading the hands apart at the bottom of the movement.
Triceps Pushdowns with Bar
Figure 6.92: Triceps Pushdowns (Bar) Starting Position
Figure 6.93: Triceps Pushdowns (Bar) Finishing Position
Video 6.44
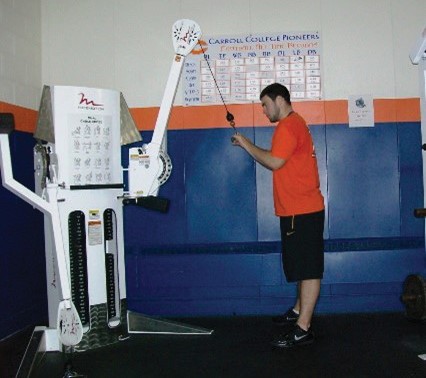
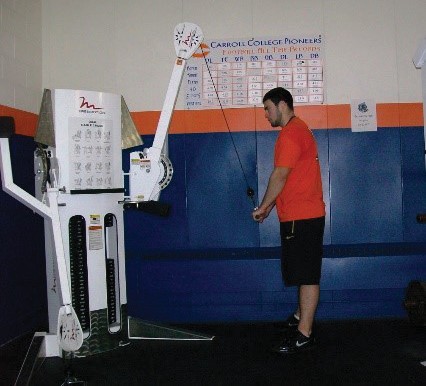
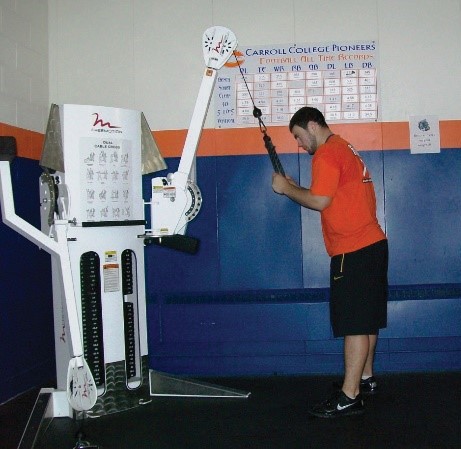
Triceps Pushdowns with Rope
Figure 6.94: Triceps Pushdowns (Rope) Starting Position
Figure 6.95: Triceps Pushdowns (Rope) Finishing Position
Video 6.45
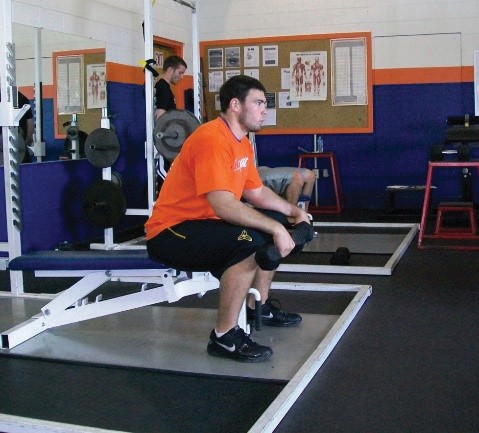
Forearm Extension
Sit on bench and grip dumbbell with overhand grip
Rest forearm on thigh with wrist just beyond knee
Raise dumbbell by pointing knuckles upward as high as possible
Return until knuckles are pointing downward as far as possible
Keep elbow approximately wrist height to maintain resistance through full range of motion
Can be done with both sides at one time, or one arm can be done at a time with other hand helping support the wrist to help isolate the movement (perform one arm version for both sides)
Figure 6.96: Forearm Extension Starting Position
Figure 6.97: Forearm Extension Finishing Position
Video 6.46
Forearm Flexion
Sit and grasp dumbbell with underhand grip
Rest forearm on thigh with wrist just beyond knee
Allow dumbbell to roll out of palm down to fingers
Raise dumbbell back up by gripping and pointing knuckles up as high as possible
Keep elbow approximately wrist height to maintain resistance through full range of motion
Can be done with both sides at one time, or one arm can be done at a time with other hand helping support the wrist to help isolate the movement (perform one arm version for both sides)